If you have been asked to access a shared mailbox, there are two supported ways to do it: Outlook on the web and Outlook on the desktop.
The full guides below will show you how to access a shared mailbox. If you are just looking for a reminder on how to access a shared mailbox, follow the Quick Reminder steps.
If you are accessing a shared mailbox for Clearing, you should have already been granted the permissions you need; please follow the steps below and if you still can't access it, contact the IT Service Desk team with details of the mailbox you are trying to access and a screenshot of any error messages you receive.
1. Visit outlook.office365.com and sign in using your staff credentials.
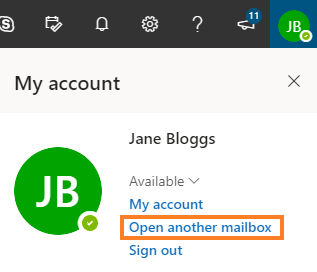
2. Click on your account initials/photo in the top right-hand corner. Select Open another mailbox.
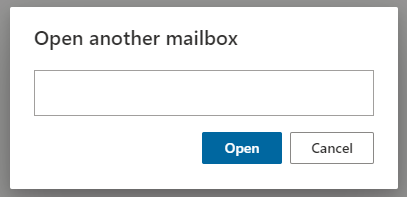
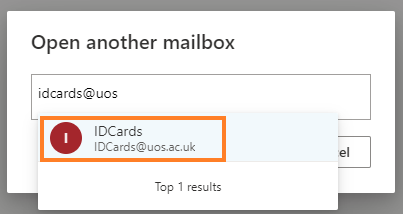
3. In the pop-up window, start typing the name of the shared mailbox.
4. Select the mailbox name once it appears.
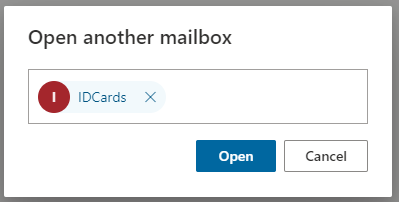
5. Click Open.
6. The shared mailbox will open in a separate browser tab. You can then manage the shared mailbox and respond to any emails from the new browser tab.
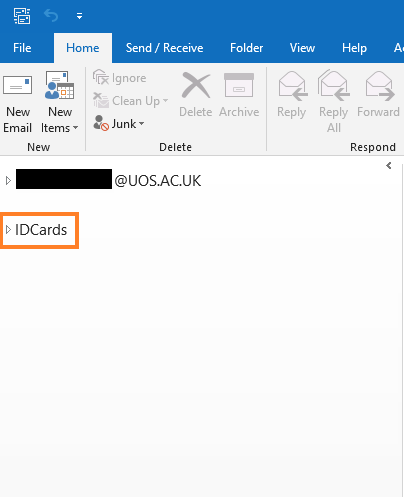
If you are using a managed University of Suffolk PC or laptop (i.e. you log in using your staff number and password), any shared mailboxes to which you have permission to access are added to Outlook desktop app automatically.
The shared mailbox will appear beneath your own inbox, as shown in the example below:
If the shared mailbox isn't appearing and you haven't restarted Outlook for some time, please close and then re-open Outlook. If it's still not showing, contact the IT Service Desk to confirm permissions have been given.
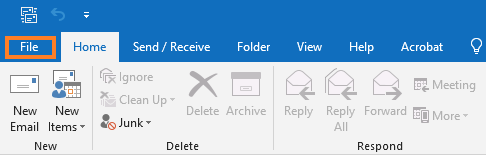
If we've checked your permissions and the shared mailbox still isn't showing in Outlook on the desktop, we may ask you to try adding it manually. Please follow these steps to do so:
1. In Outlook, click on the File tab.
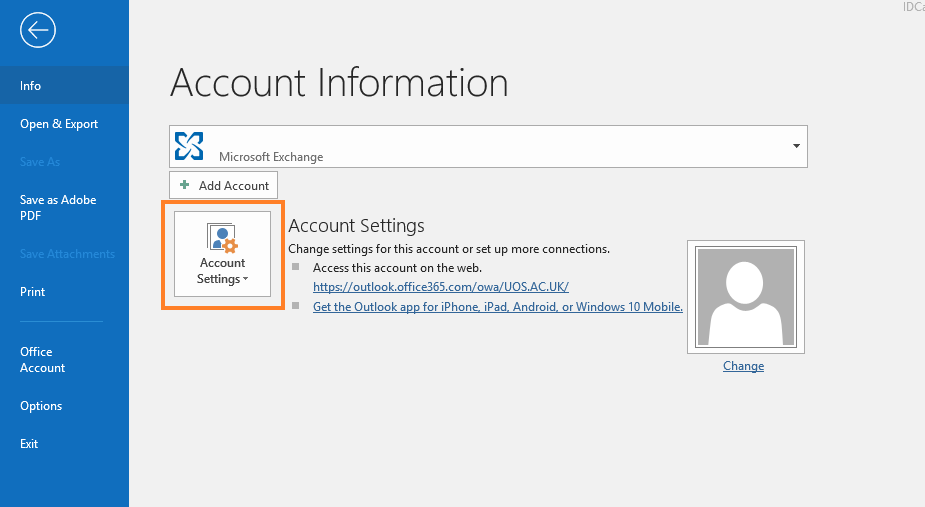
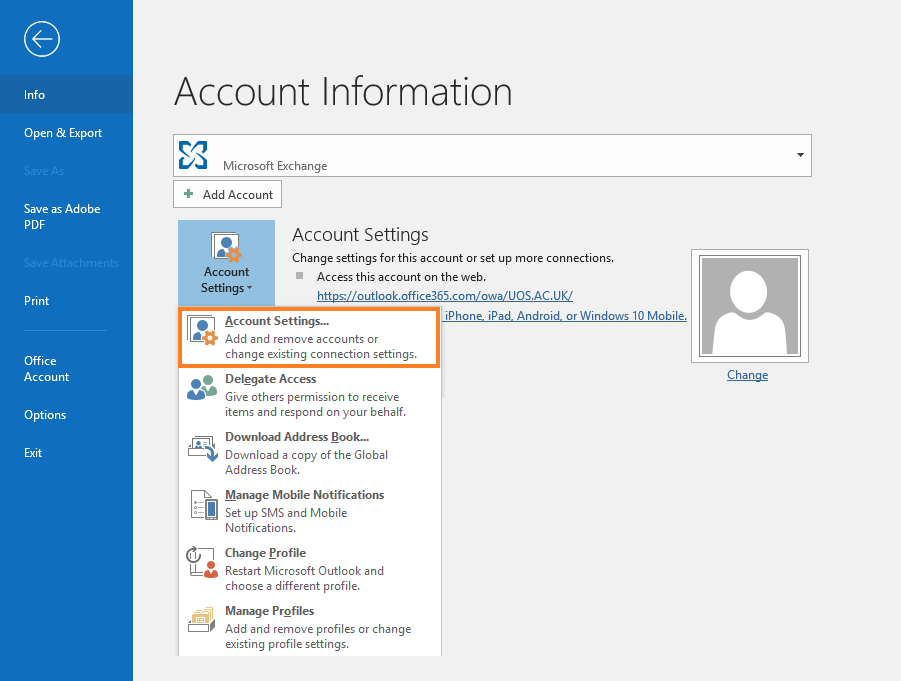
2. Click on Account Settings, then choose Account Settings from the drop-down menu.
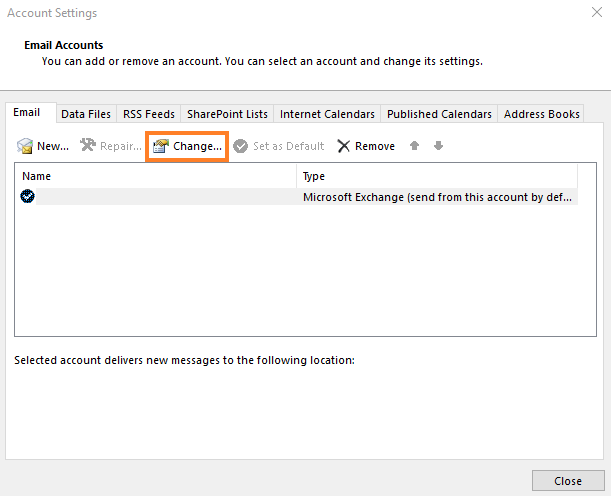
3. In the window that opens, select the Email tab. Make sure your staff email account is highlighted and click Change.
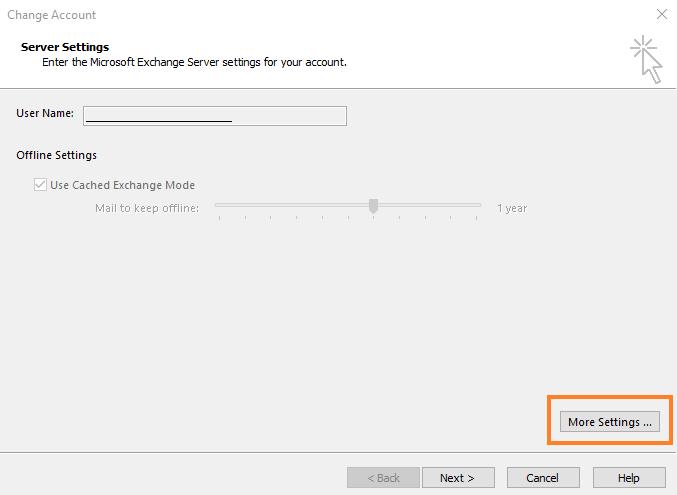
4. Click on More Settings.
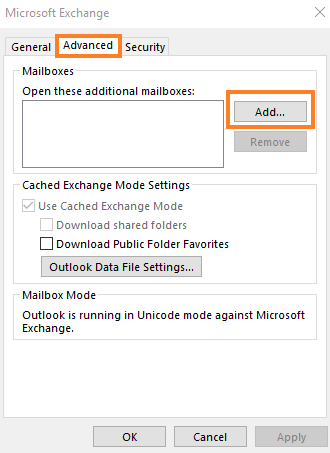
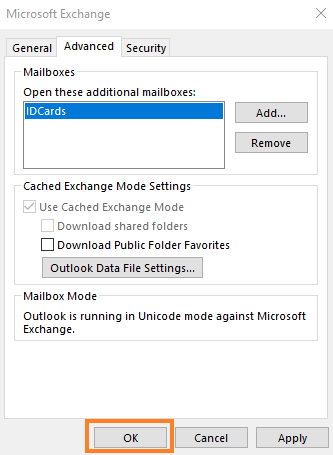
5. In the window that opens, select the Advanced tab and then click Add.
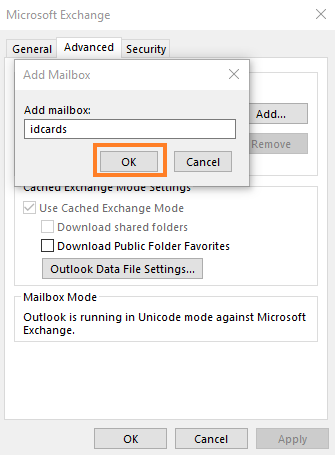
6. Type the name of the shared mailbox into the box and click OK.
7. Click OK again.
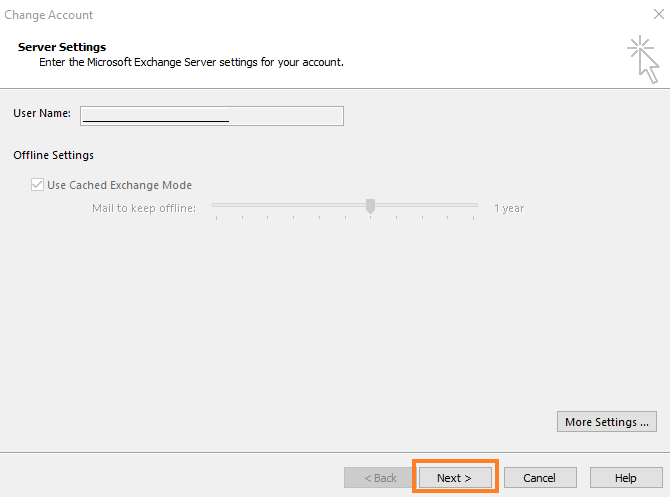
8. Click on Next and then Finish to complete the steps.
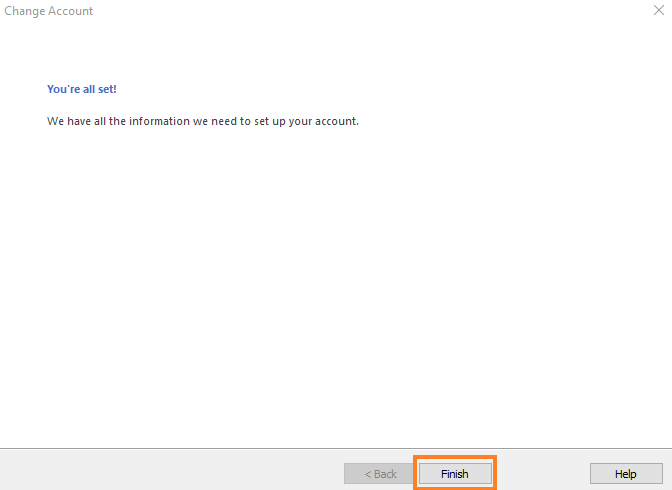
9. Verify that the shared mailbox is now showing in Outlook.
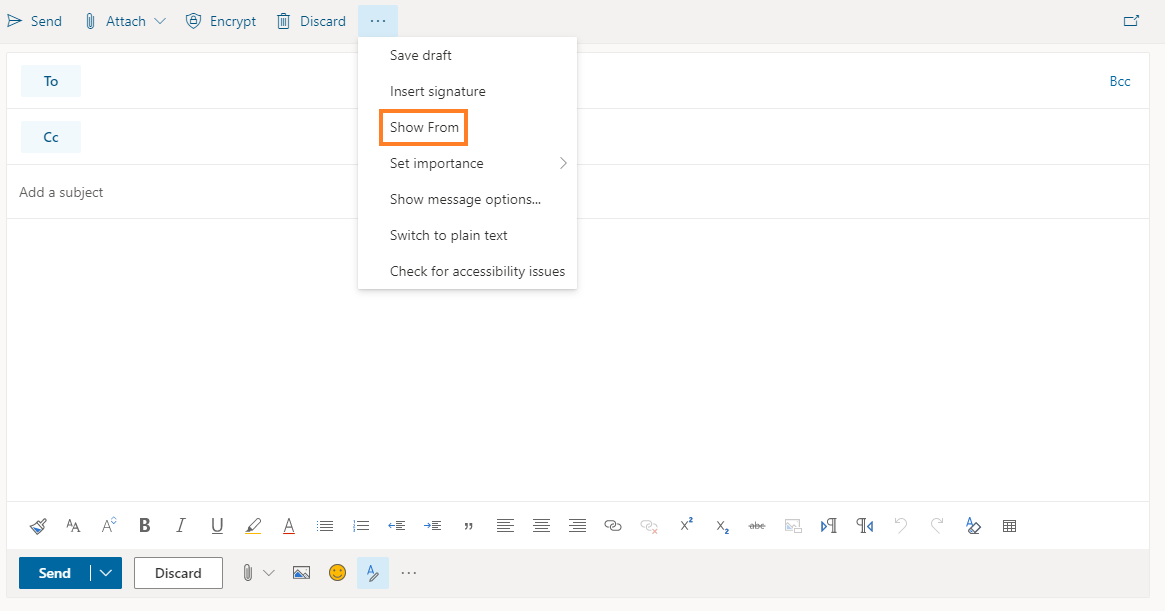
If you are accessing a shared mailbox using Outlook on the web, the mailbox will open in a new browser tab. When you reply to an email or create a new one, this will default to the shared mailbox as the sender.
You can check this on the draft email by clicking on the more options menu and selecting Show From:
If you are accessing a shared mailbox using Outlook on the desktop, you can view and change the sending address by following these steps:
In the draft email, select the Options tab.
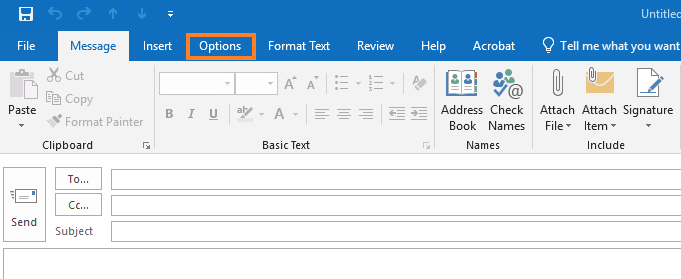
Click From in the menu ribbon.
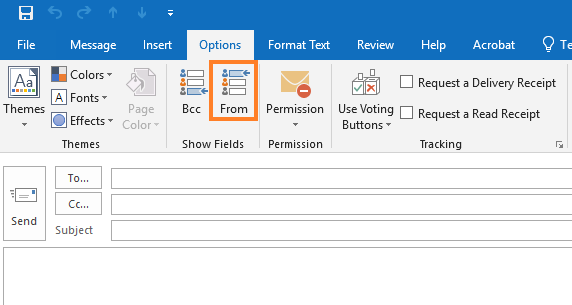
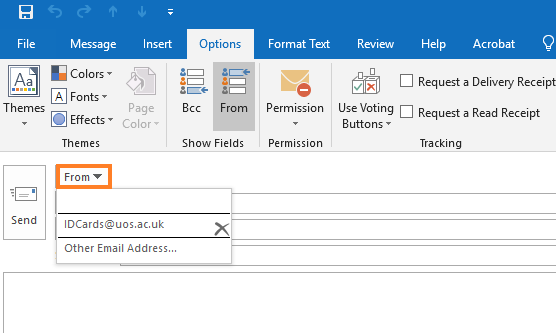
The From button will be added to the email header. Click From in the email header and select the shared mailbox. If it isn't showing, select Other email address.
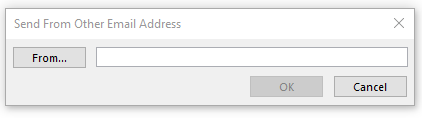
Type in the shared mailbox email address and click OK.
Outlook on the web
1. Open a web browser. Log in to your University of Suffolk email account.
2. Click on your account icon in the top right-hand corner.
3. Select Open another mailbox.
4. Type in the name of the shared mailbox and select it when found.
5. Click Open.