Here is some useful information and guidance on using the Outlook app on your computer.
This page is still under construction, More guides are being added weekly so please check back soon.
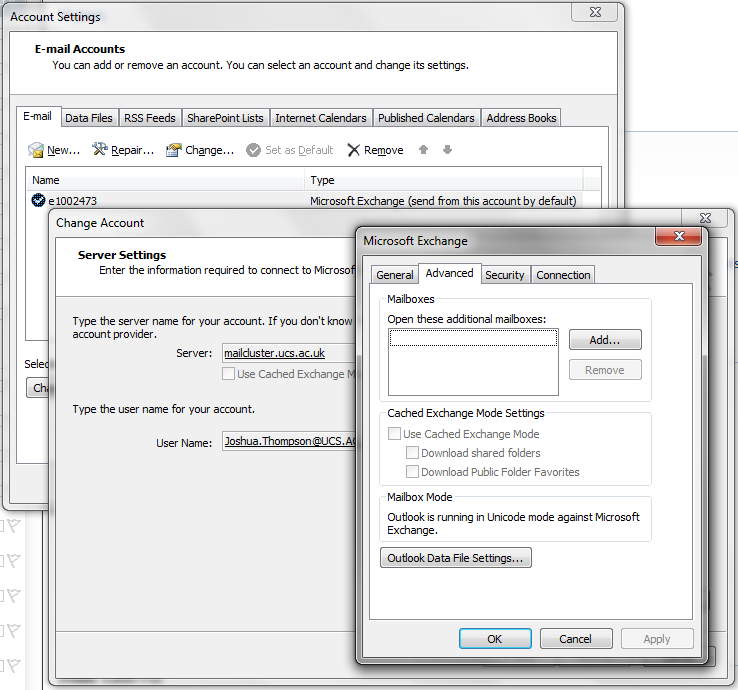
If you require access to an Additional Mailbox, you can add a Mailbox to your Outlook folder list, the delegate must first give you access to the part of the Mailbox by setting permissions (as set out in the previous step 'Granting delegate access to your email'). You will only see the folders and features the delegate has granted you access to.
To add a Mailbox when the delegate has set access permissions for you.
Click File > Account Settings > Account Settings > Change > More Settings >Advanced tab and Add > type the name of the Mailbox you wish to add, usually the name of the person (see screenshot below).
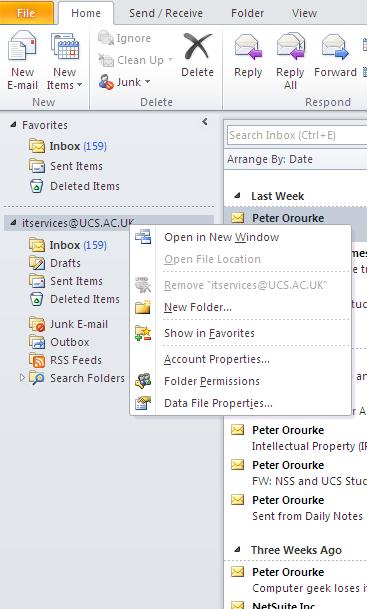
Students and staff have different Mailbox size limits determining how much email storage space is available to you. If you want to know the size of your Mailbox please do the following: Open Outlook; right click on the top Mailbox folder with your name listed (see screenshot below) and left click Data File Properties; select Folder Size and Total Size, it will be displayed in KB.
The table below provides you with UCS Mailbox size limits. It is rare that a mailbox size limit will be increased, however, if you wish to have your Mailbox increased please contact the IT Helpdesk.
Please note if your Mailbox reaches the limit where email cannot be received any email sent to you will return an undeliverable message to the sender.
1024KB is 1MB.
| Message | Students | Message | Staff |
|---|---|---|---|
| Warning | 225MB | Warning | 725MB |
| Cannot Send Email | 250MB | Cannot Send Email | 750MB |
| Cannot Send or Receive | 350MB | Cannot Send or Receive Email | 1GB |
If you need to find out what your email address is you can find it in Microsoft Outlook at the top of the list of folders on the left hand pane (above the Inbox). For example: j.bloggs@ucs.ac.uk

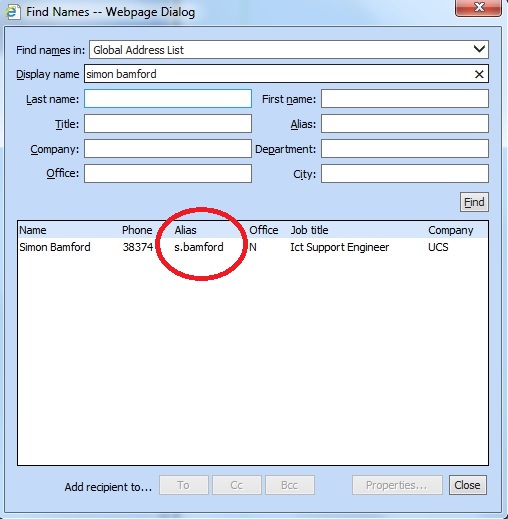
In Webmail it is a little different if you compose a new email then select: To. Next, in the Display Field box type in your name and select: Find. Under 'Alias' it will display your email address and you need to remember it will have: @ucs.ac.uk at the end. For example: j.bloggs@ucs.ac.uk
Creating Rules to manage your email
Creating Rules allows you to manage email arriving in your Inbox. For example, you could create a Rule so that Outlook places all email from a specific email address into a particular folder. You can set rules based on words in the subject line, sender's name, or play alerts when certain mail arrives. There are lots of other options available in Rules as well.
To set up a Rule: click the Home tab; Rules; Manage Rules and Alerts. In the pop-up window click: New Rule, the Rules Wizard dialog will pop-up (see screenshot below).

The rules Wizard is now at Step 1: Select a template, choose the template that most closely resembles the action you would like to take. Ensure you select a template from the Stay Organized or Stay Up to Date sections. Please Note: Advanced users may want to select an option from the Start from a blank rule section to have more freedom in constructing their rule criteria. The box at the bottom of the window is Step 2: you can edit the rule description, click on the underlined text in order to specify the details of your rule.
Click: Next, select any additional conditions you would to add to the Rule. Specify any additional details for those criteria in the box at the bottom of the window called Step 2:edit the rule description box (optional).
Click Next Step 1 asks what do you want to do with the message, edit the Rule description (optional).
Click Next and Step 1 again allows you to select any exceptions to the rule and specify the details for those criteria in the Step 2: Edit the rule description box (optional); click Next to Finish the Rule setup; type a name for the rule in the box for Step 1: Specify a name for this rule. Tick the box next to Run this rule now if you want to apply the rule to messages already received. Review the settings you have selected in Step 3: Review Rule Description. Click Finish.
Your new rule will now appear listed, with a description of the settings, in the Rules and Alerts dialog box
Editing and deleting rules
To edit an existing rule:click Home; Rules; Manage Rules and Alerts. The Rule and Alerts dialog box will pop-up; select the rule you wish to edit by clicking on it once; click Change Rule and select the action you would like to perform.
To turn off an existing rule:
Click:Home; Rules; Manage Rules and Alerts. The Rule and Alerts dialog box will pop-up: Untick the box next to the rule you wish to turn off; click OK.
To permanently delete an existing rule:
Click: Home; Rules; Manage Rules and Alerts. The Rule and Alerts dialog box will pop-up: select the rule you wish to delete by clicking on it once; click the delete button.